Customers often prefer to see just how much they’ll be paying before they pull out their wallets. That’s why quotes are a salesman’s best friend.
But what if the customer looks at the quote and decides, “Yep! Looks good.” You’ll definitely want to get that payment ball rolling before he has a chance to change his mind.
If you’re using Stripe alongside HubSpot to manage customer payments, we have an app called sass•hapily (formerly Zaybra) that can get things moving! Its Custom Quote allows you to name the price, collect your payments, and sync your data to Stripe all in one fell swoop!
But in order to do this, you’ll need to use sass•hapily to map your Stripe products to your HubSpot products. Don’t worry, I’ll show you how! Just make sure that a matching HubSpot product exists for every Stripe product you want to map.
How to create products in HubSpot so you can map them to Stripe
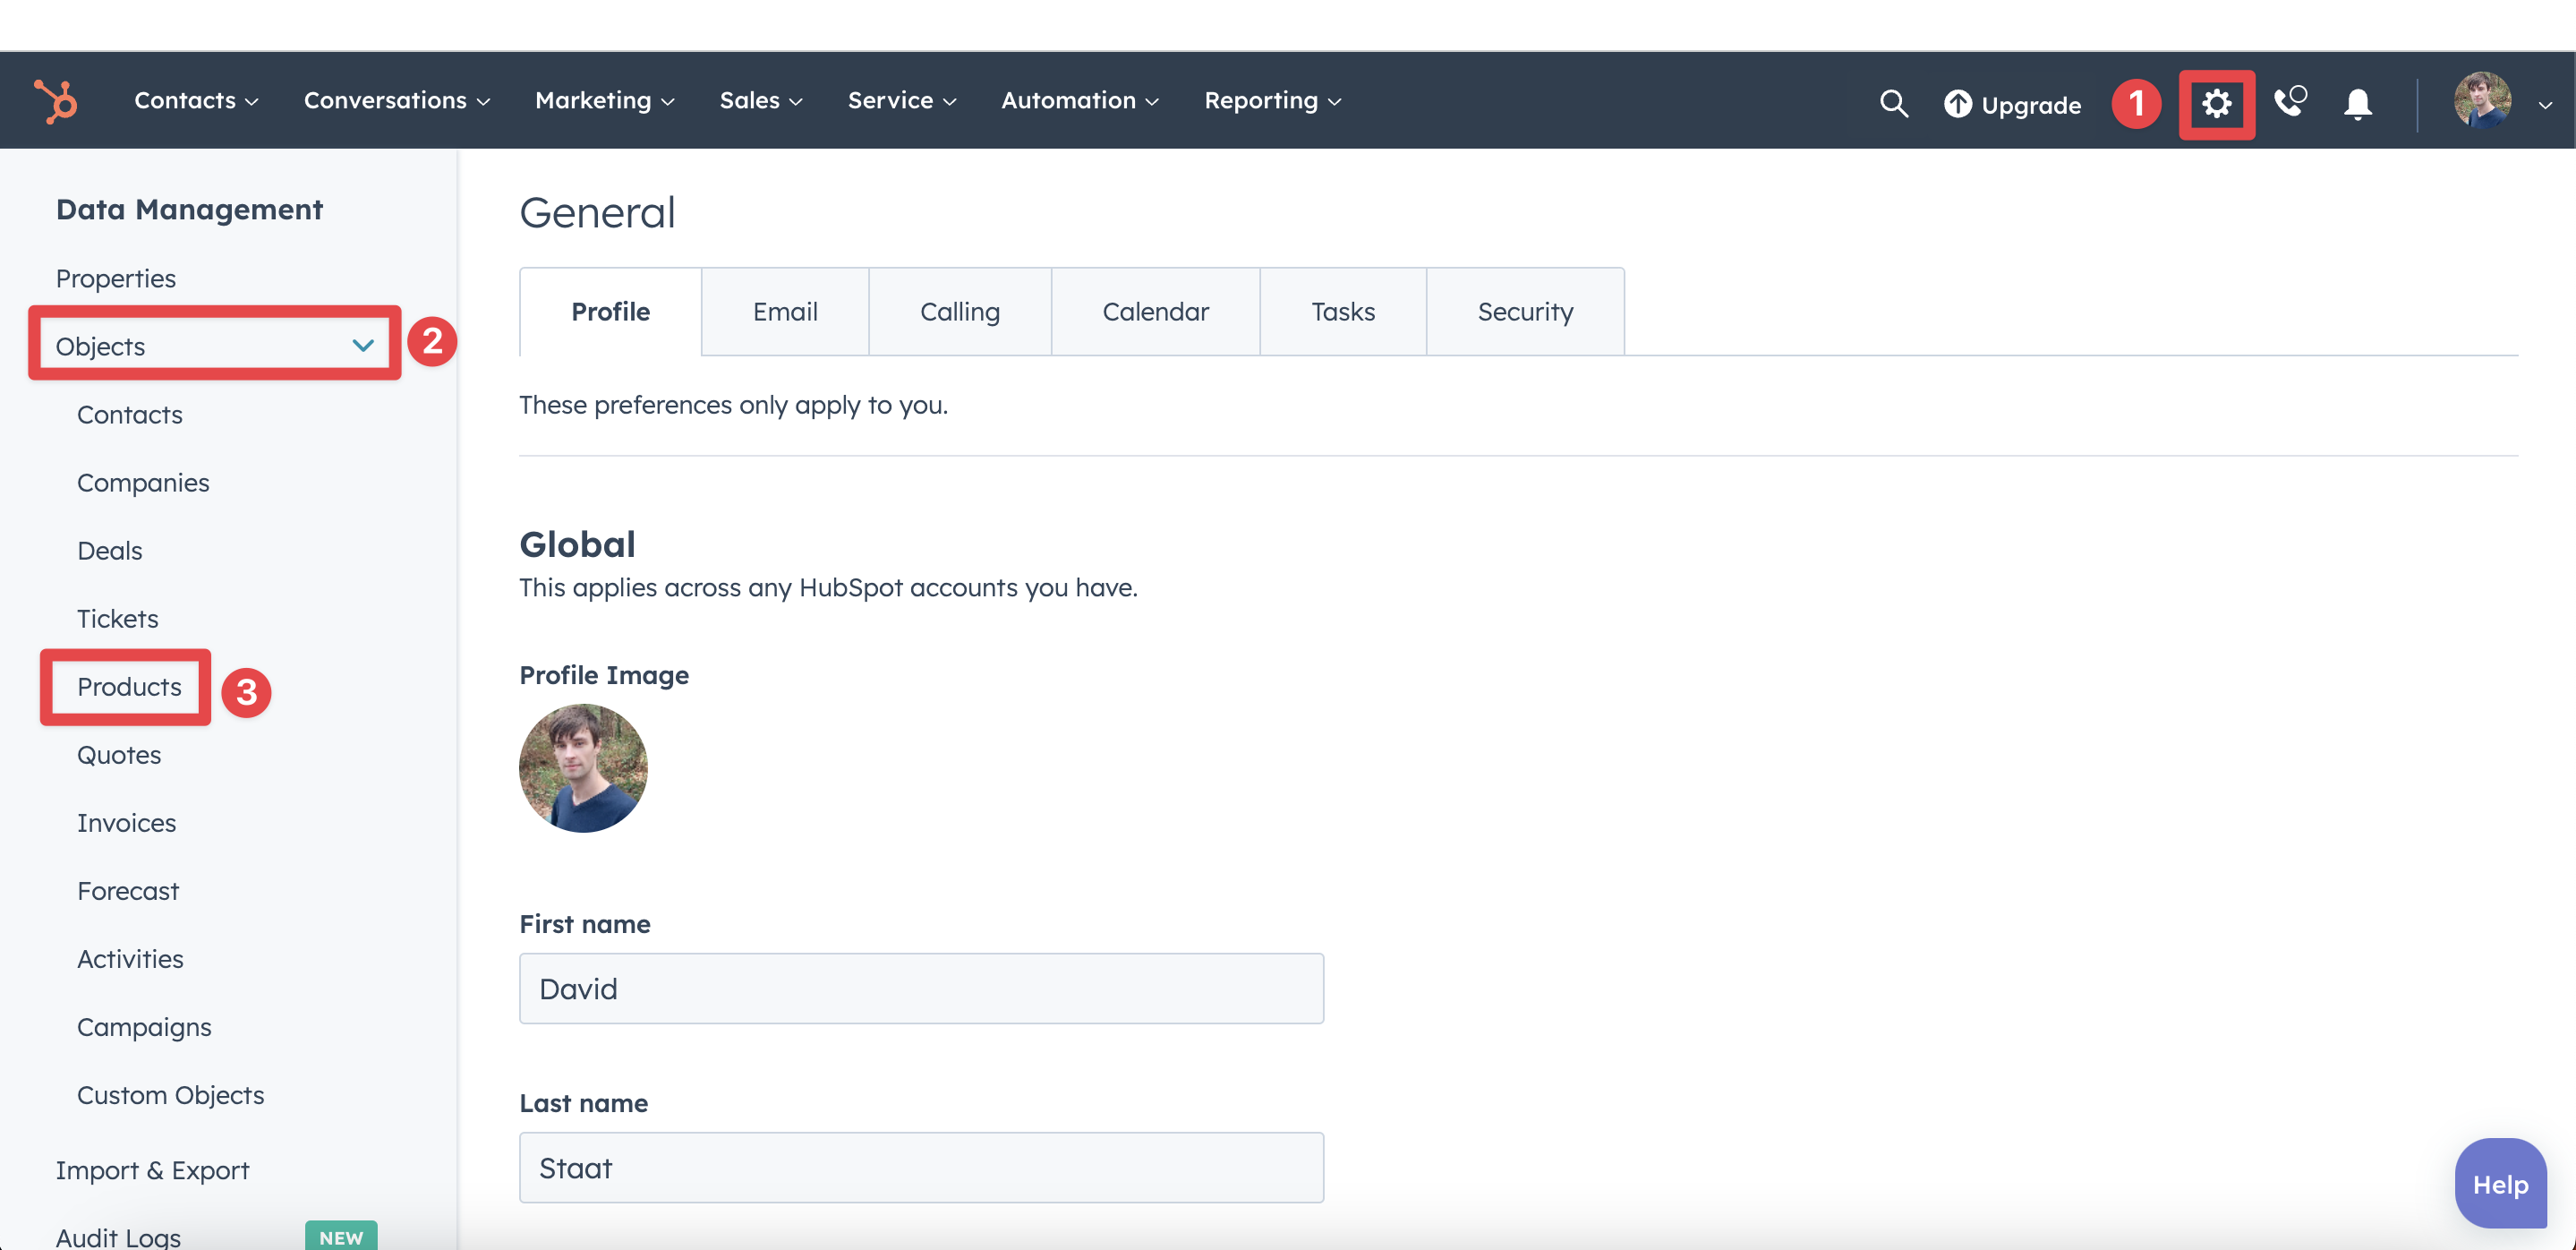
Like I said above, you’ll need a product in your HubSpot instance to match a given Stripe product to. In order to create one:1. Click the little Settings gear in the top right of your HubSpot portal.
2. In the left sidebar, click Objects > Products. This will take you to the products page!
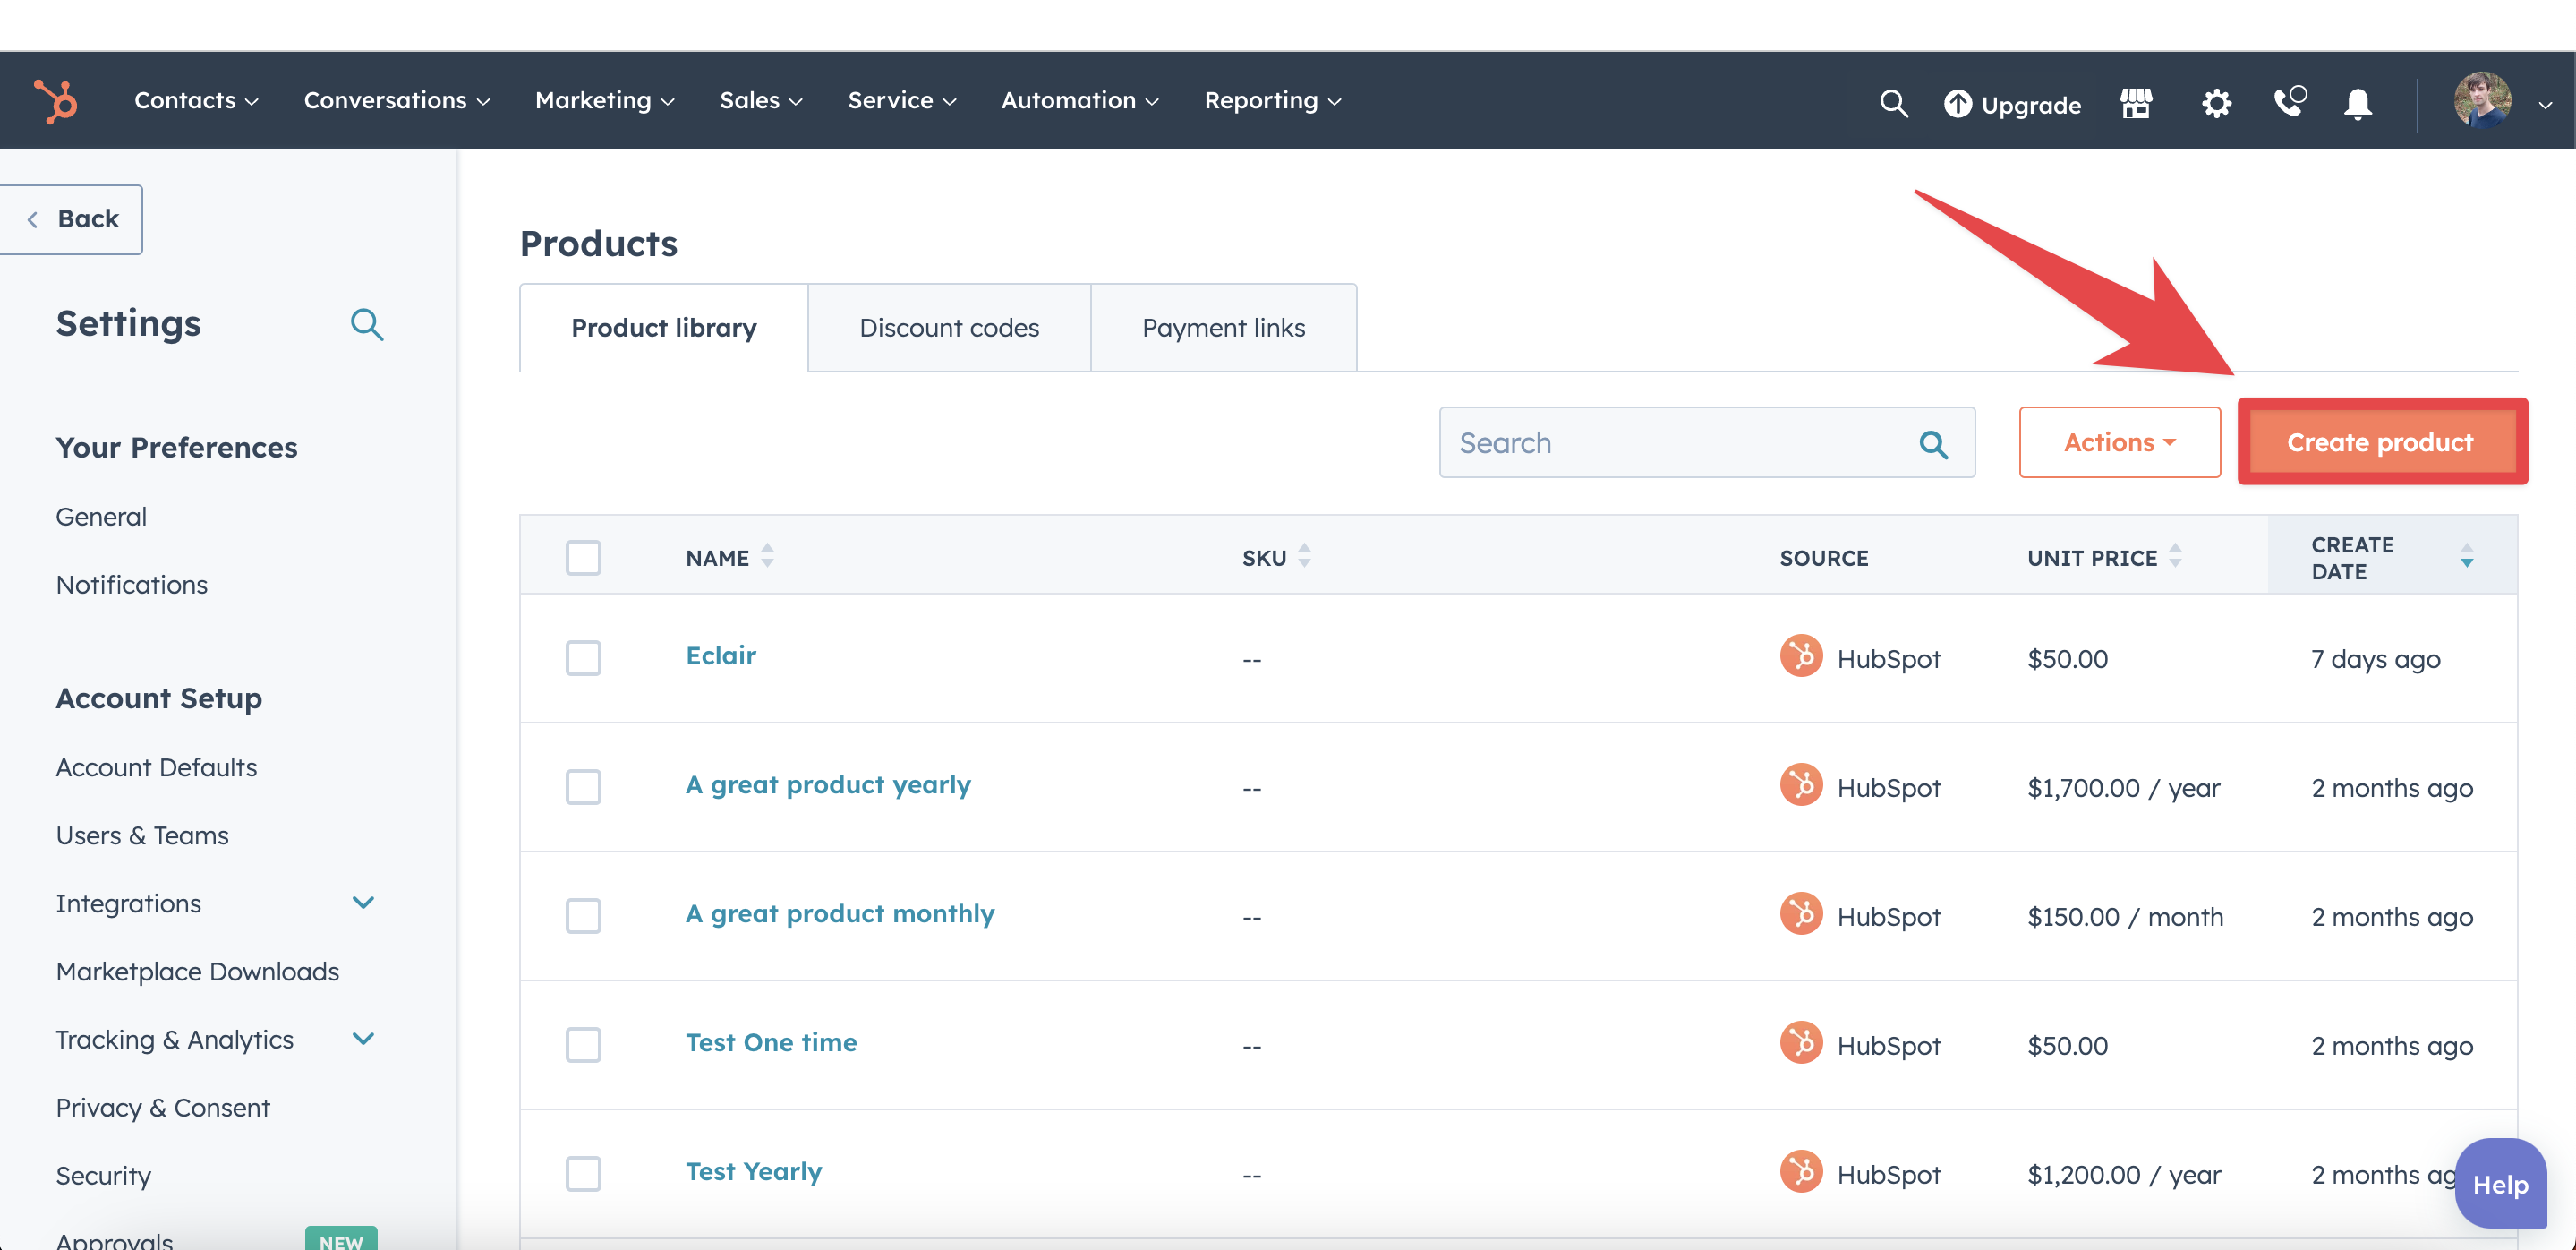
3. Click Create product on the right side of your portal.
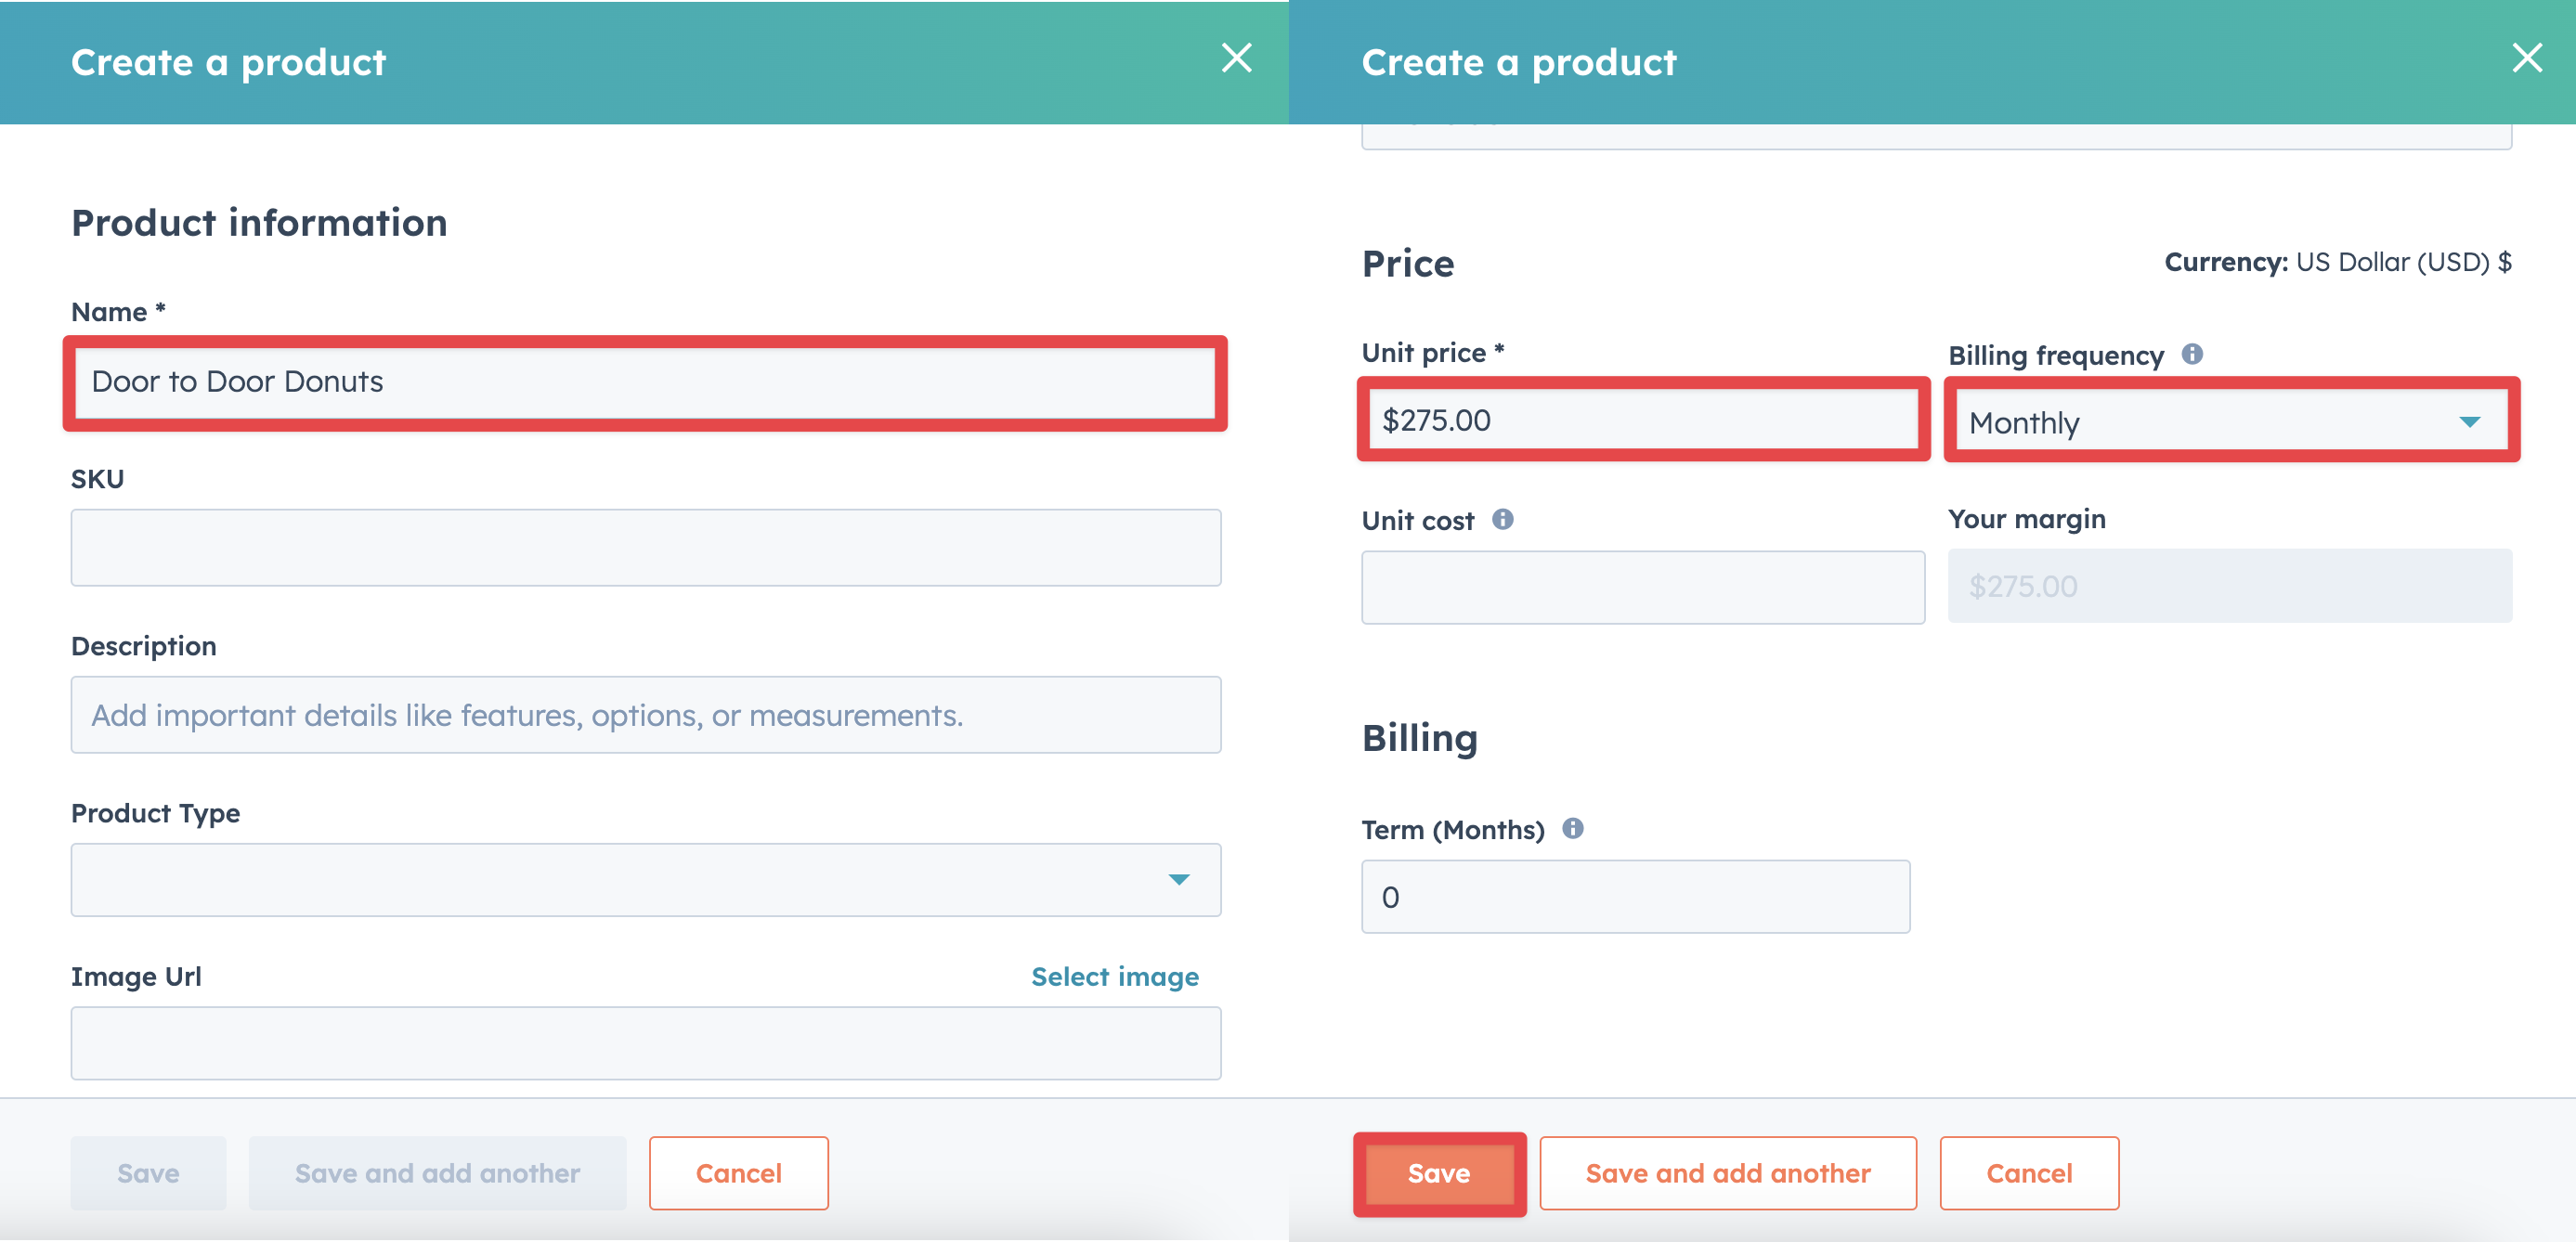
4. Give your product an appropriate Name, Unit price, and Billing frequency. Make sure they match the respective Stripe product!
5. Click Save and that’s all she wrote!
Now that that’s done we can get down to business. Time to start product mapping!
How to map Stripe products to your HubSpot instance
The great thing about this is that you can actually get it done while setting up the app. If you’ve already installed sass•hapily or just need to add some new products to your lineup, you can update mapped products from your hapily portal!
1. Start by logging into your hapily portal here.
2. In the left sidebar, click sass•hapily > Product Mapping. This will take you to the product mapping page.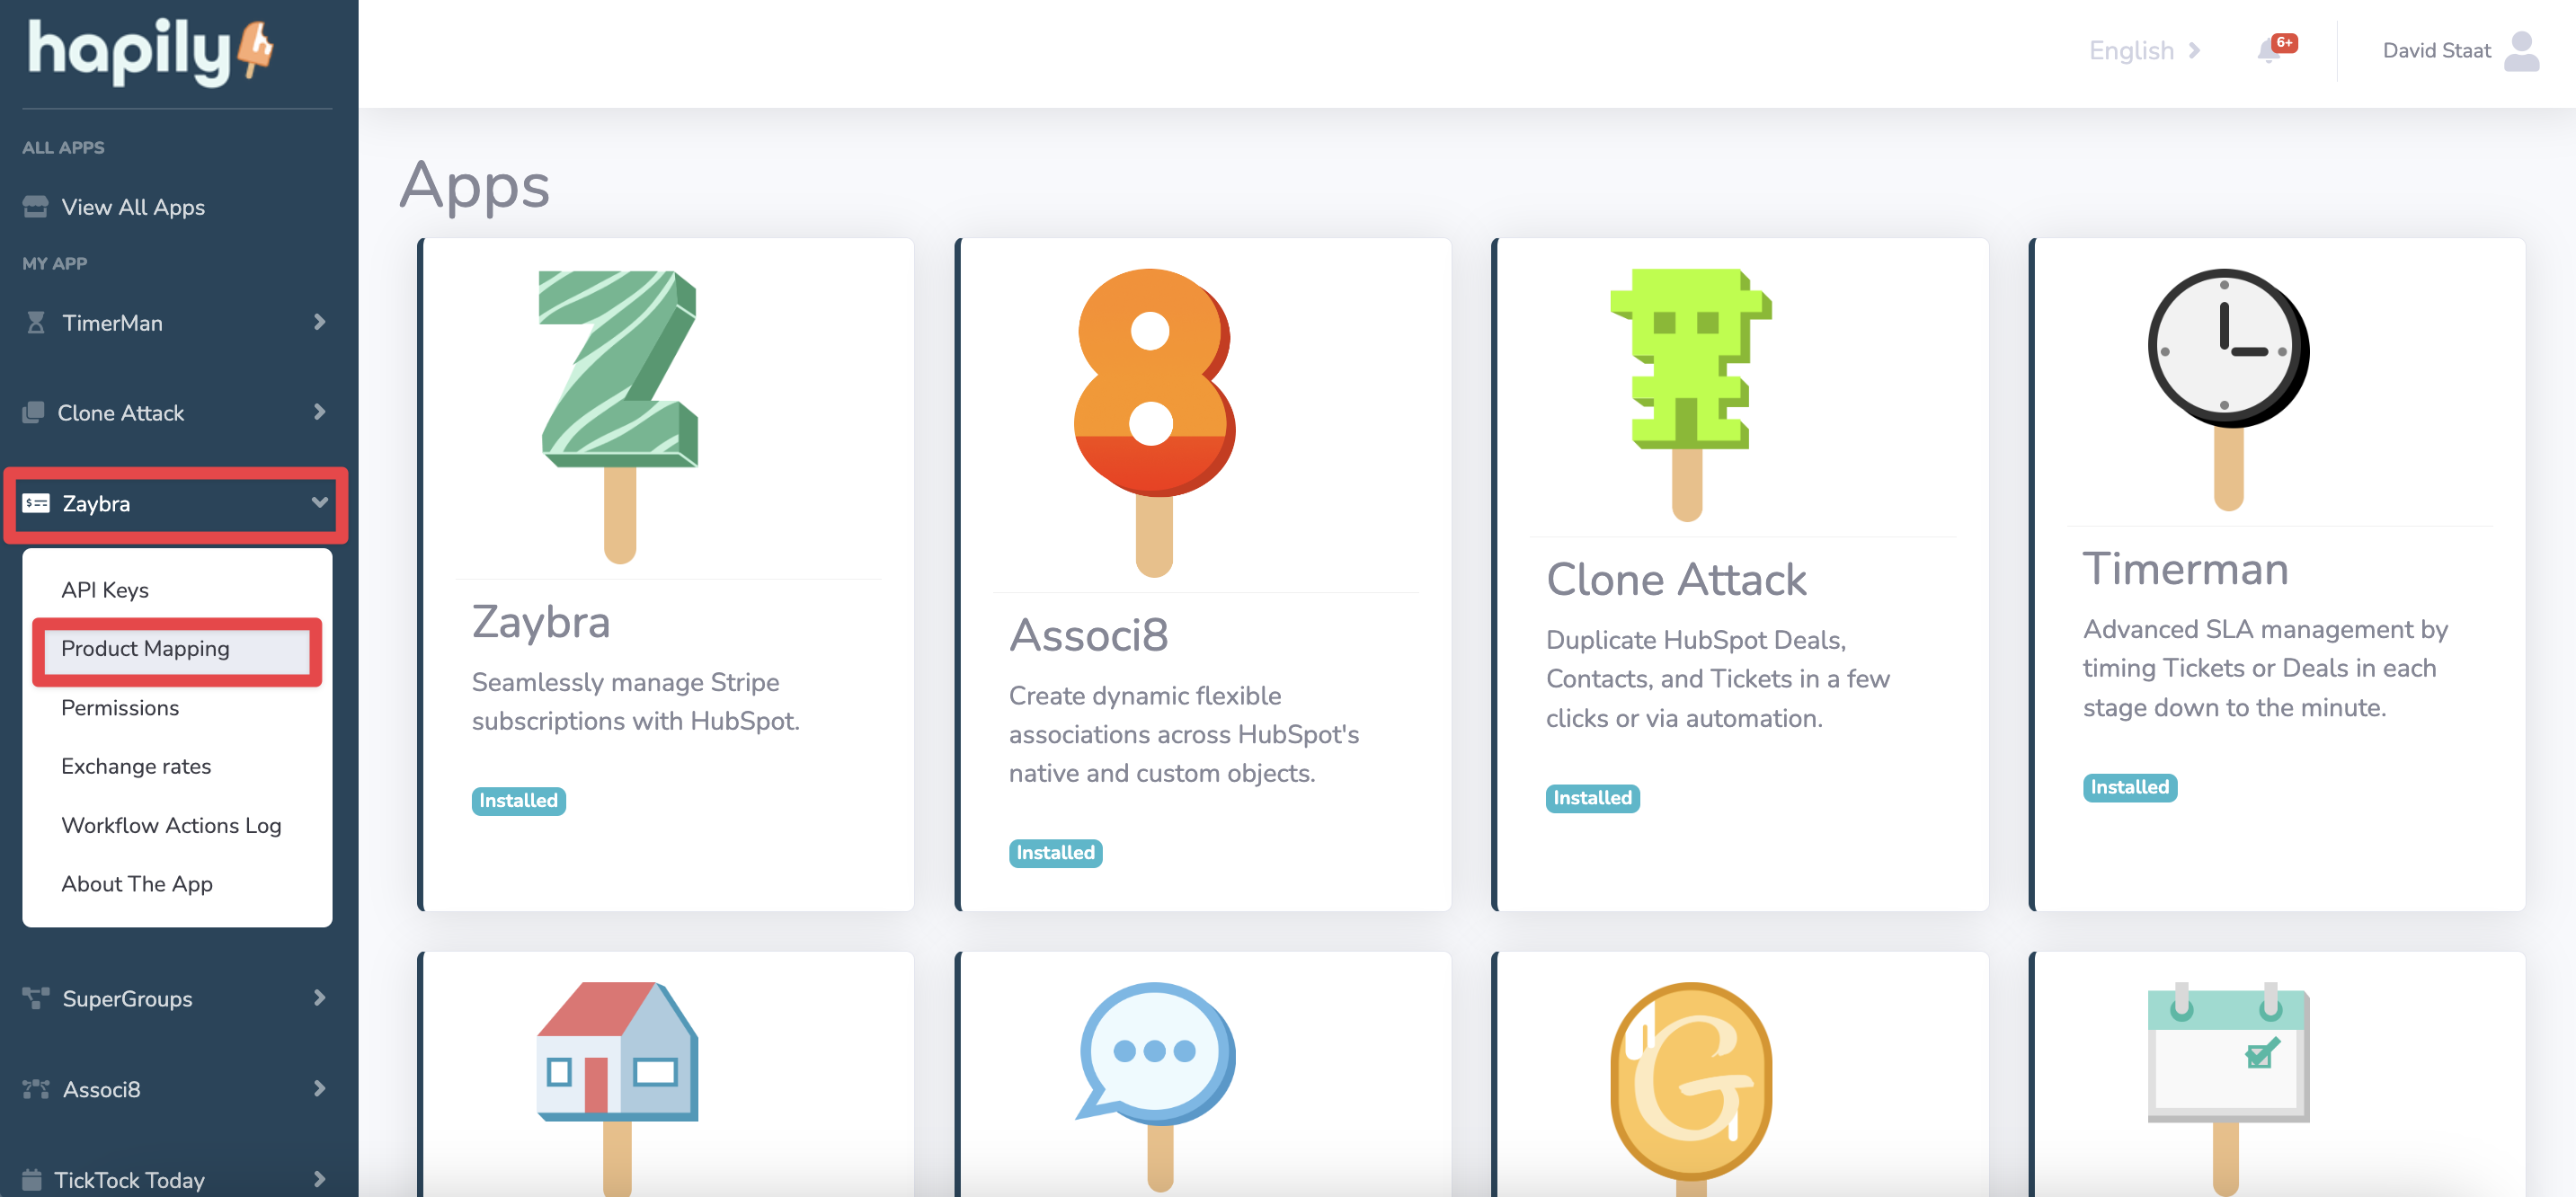
3. On the product mapping page, you’ll see two columns. One for HubSpot and the other for Stripe. Click the Select box at the top of the HubSpot column to see a dropdown of all of your HubSpot products. Pick the one you’d like to map a Stripe product to.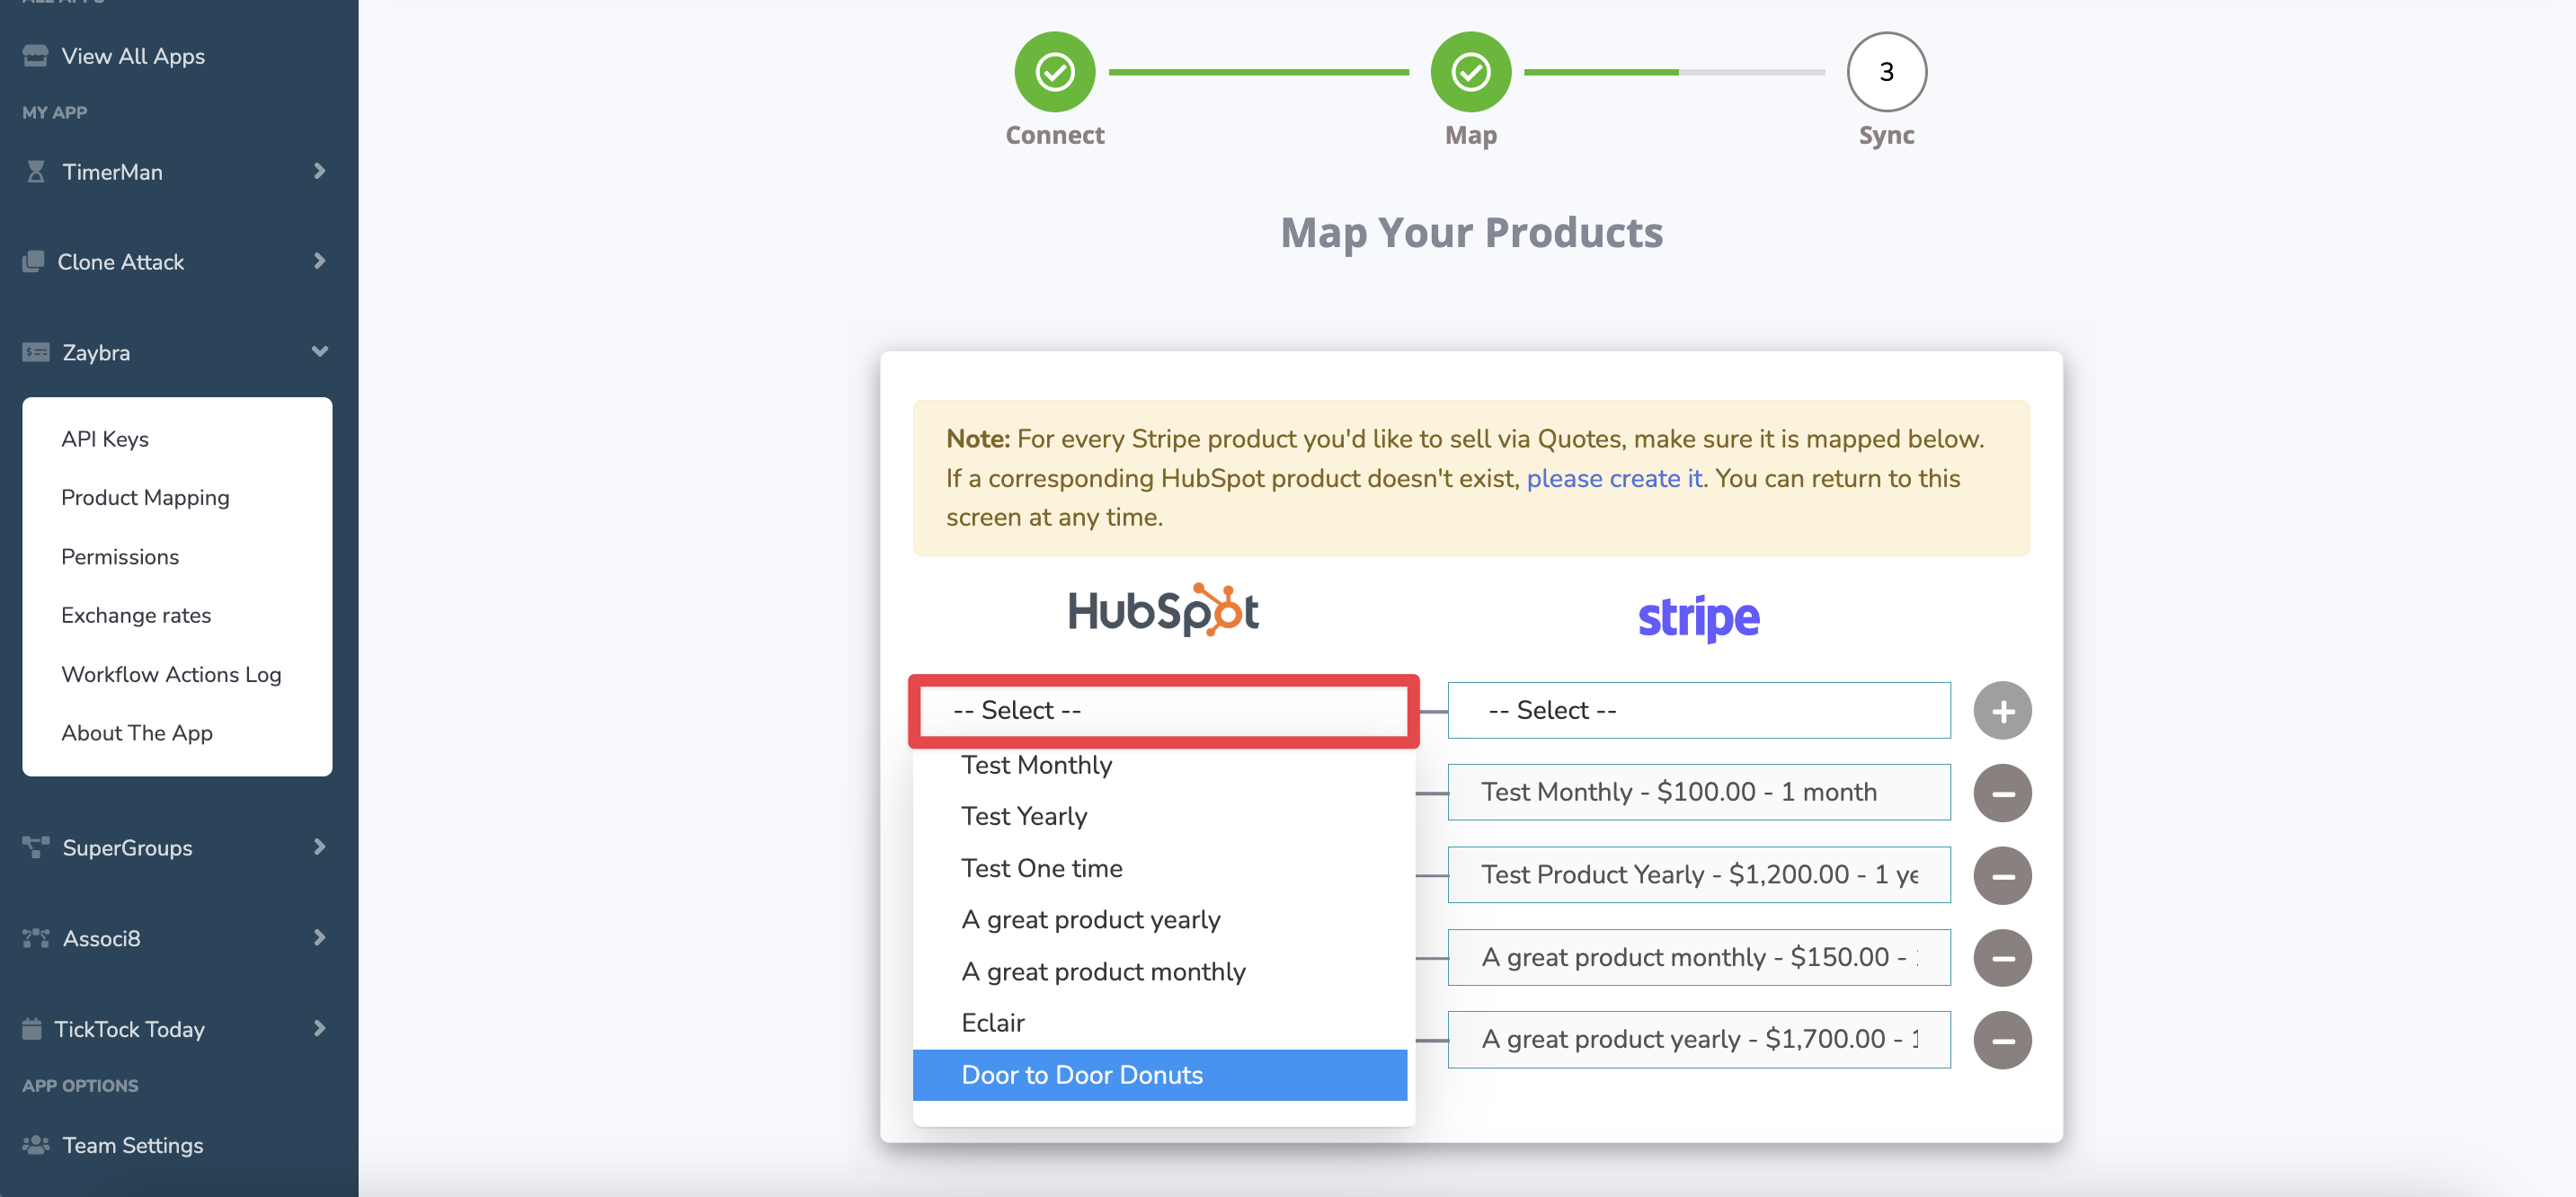
4. Once you’ve done that, click the Select box at the top of the Stripe column. Find the product you want to map to the Stripe product you’ve selected.
5. All that’s left is to click the + button next to your selection. Bam! All done. You can repeat this process for as many products as you need.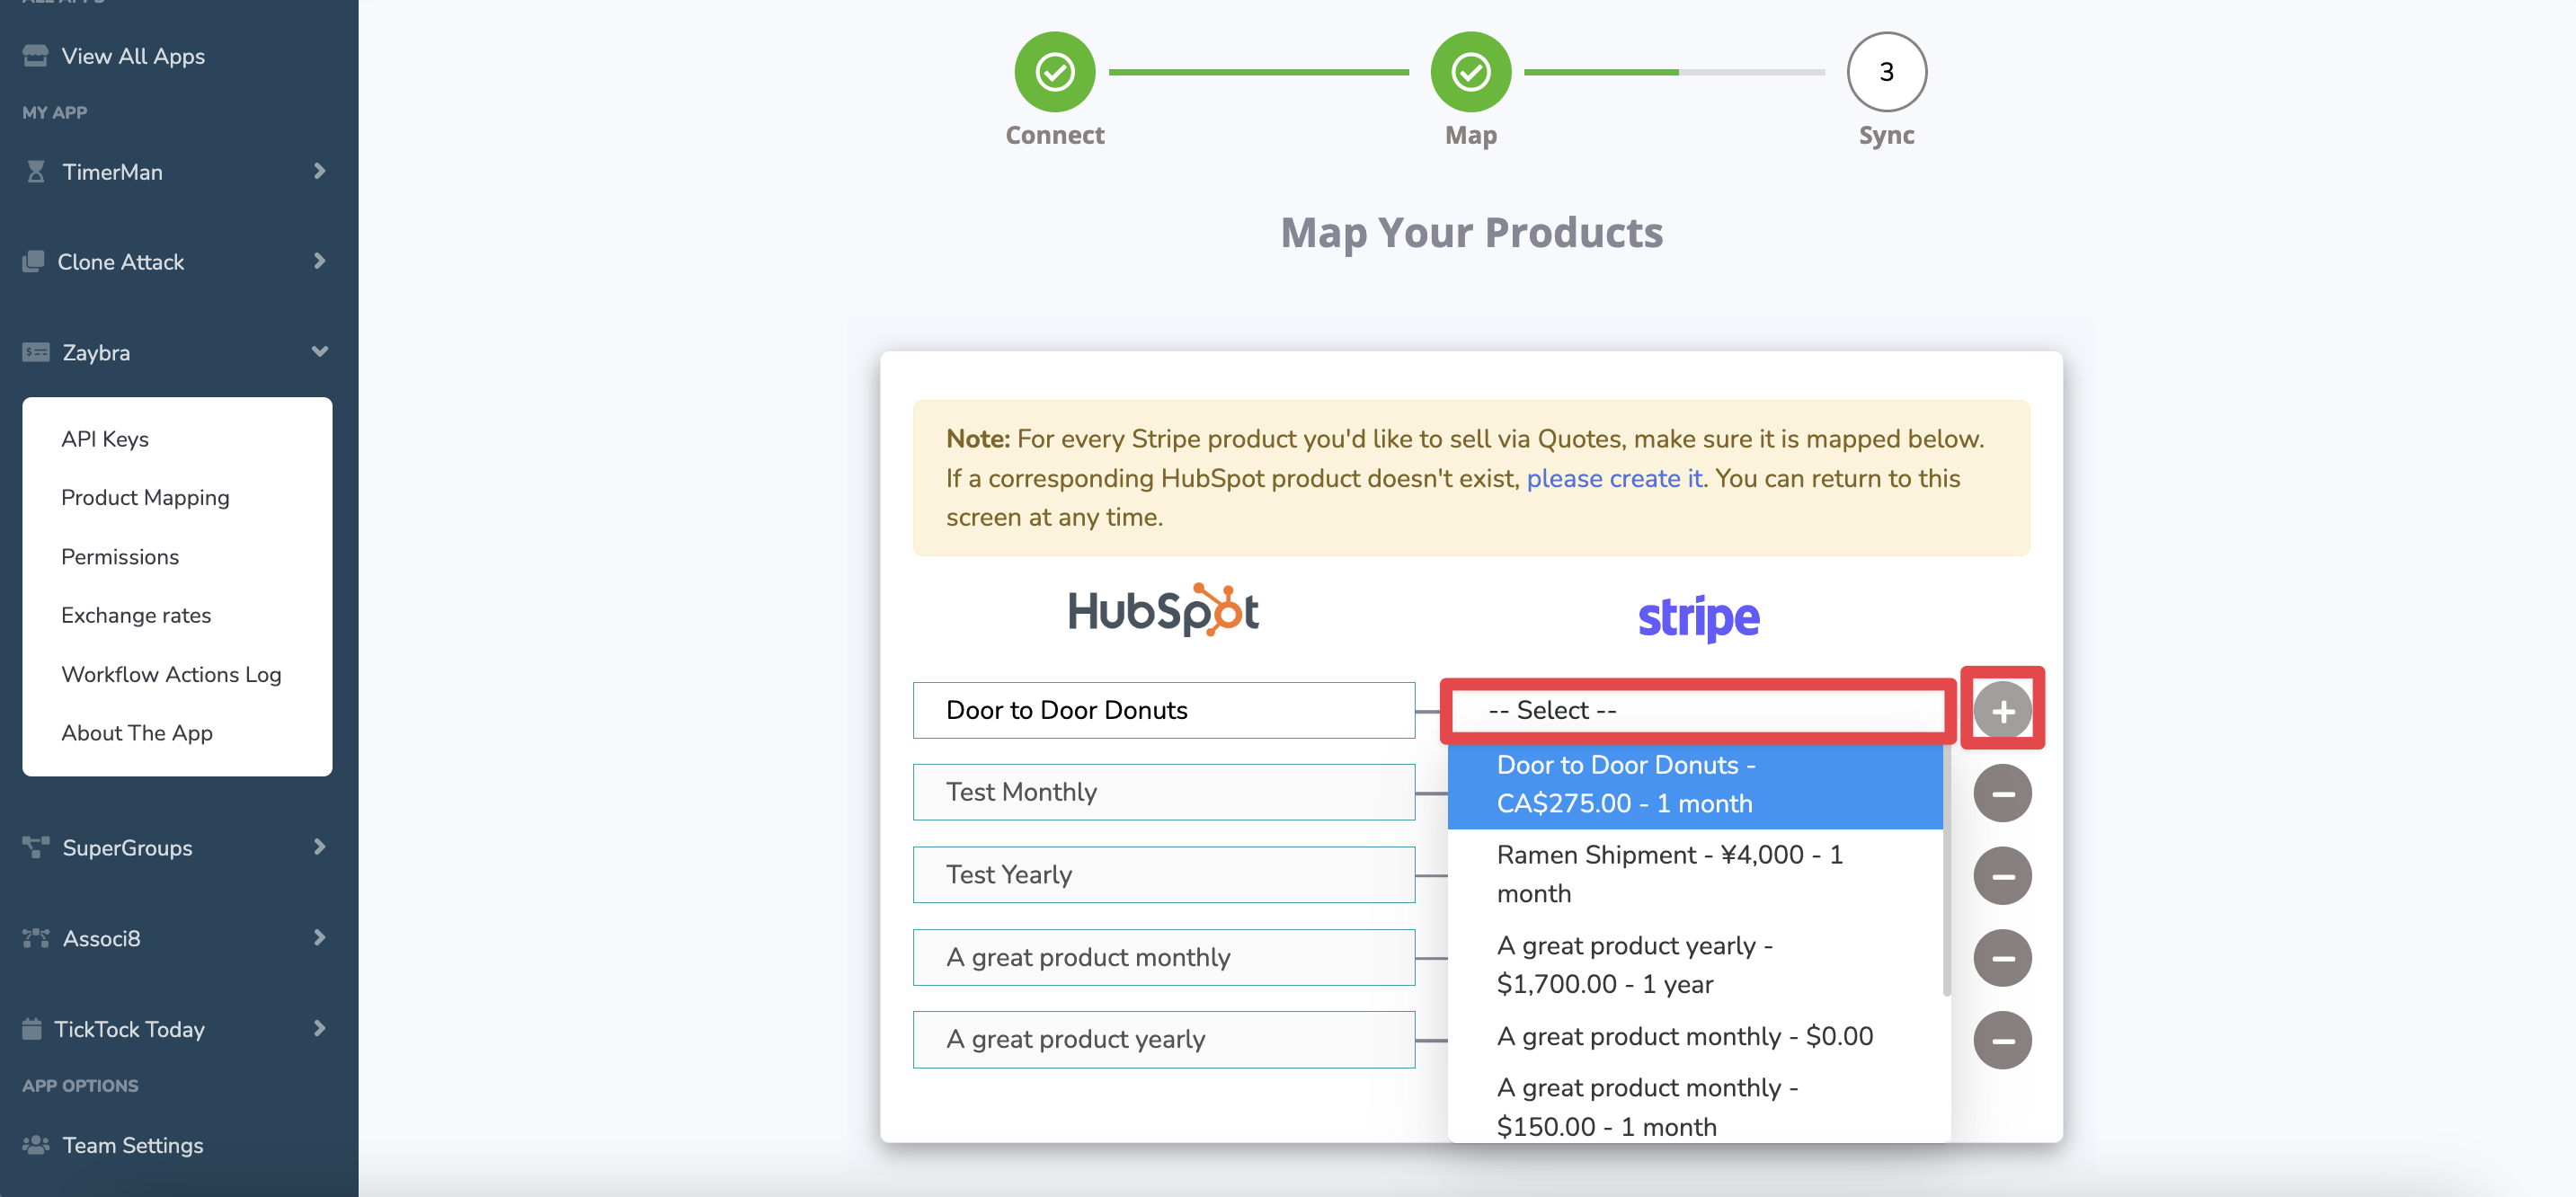
That’s all there is to it! Easy right? Now you can collect payments for these products instantly whenever you use the sass•hapily custom quote! Need some help setting up the custom quote? Check out our knowledge base article here.
If you enjoyed this post, why not share it with your friends? And if you want to see what else the app can do, check out this blog post on How to Add Metadata to a Stripe Subscription Using sass•hapily!


