Stripe is such a great payment platform! And it has so many different ways to keep track of your information too.
But even with all of those options, you may find yourself in one of those “edge cases” that Stripe doesn’t cover.
Maybe you need to mark a subscription as a certain “type” or add some additional notes to it. That’s where metadata comes in. And using saas•hapily, we can automatically add metadata to a subscription whenever a quote is paid! Let’s find out how.
How to use saas•hapily’s “Stripe Quote Metadata” property
Alright, so you’ve created a sweet deal for a client. But you’ve got some extra info about the deal you’d like to log on the subscription. The problem? The subscription hasn’t been made yet. And it won’t be until the customer pays up. What if you forget about it by then?
Not to worry! We can use saas•hapily’s new deal property Stripe Quote Metadata and the saas•hapily Custom Quote to automatically add this info to the subscription!
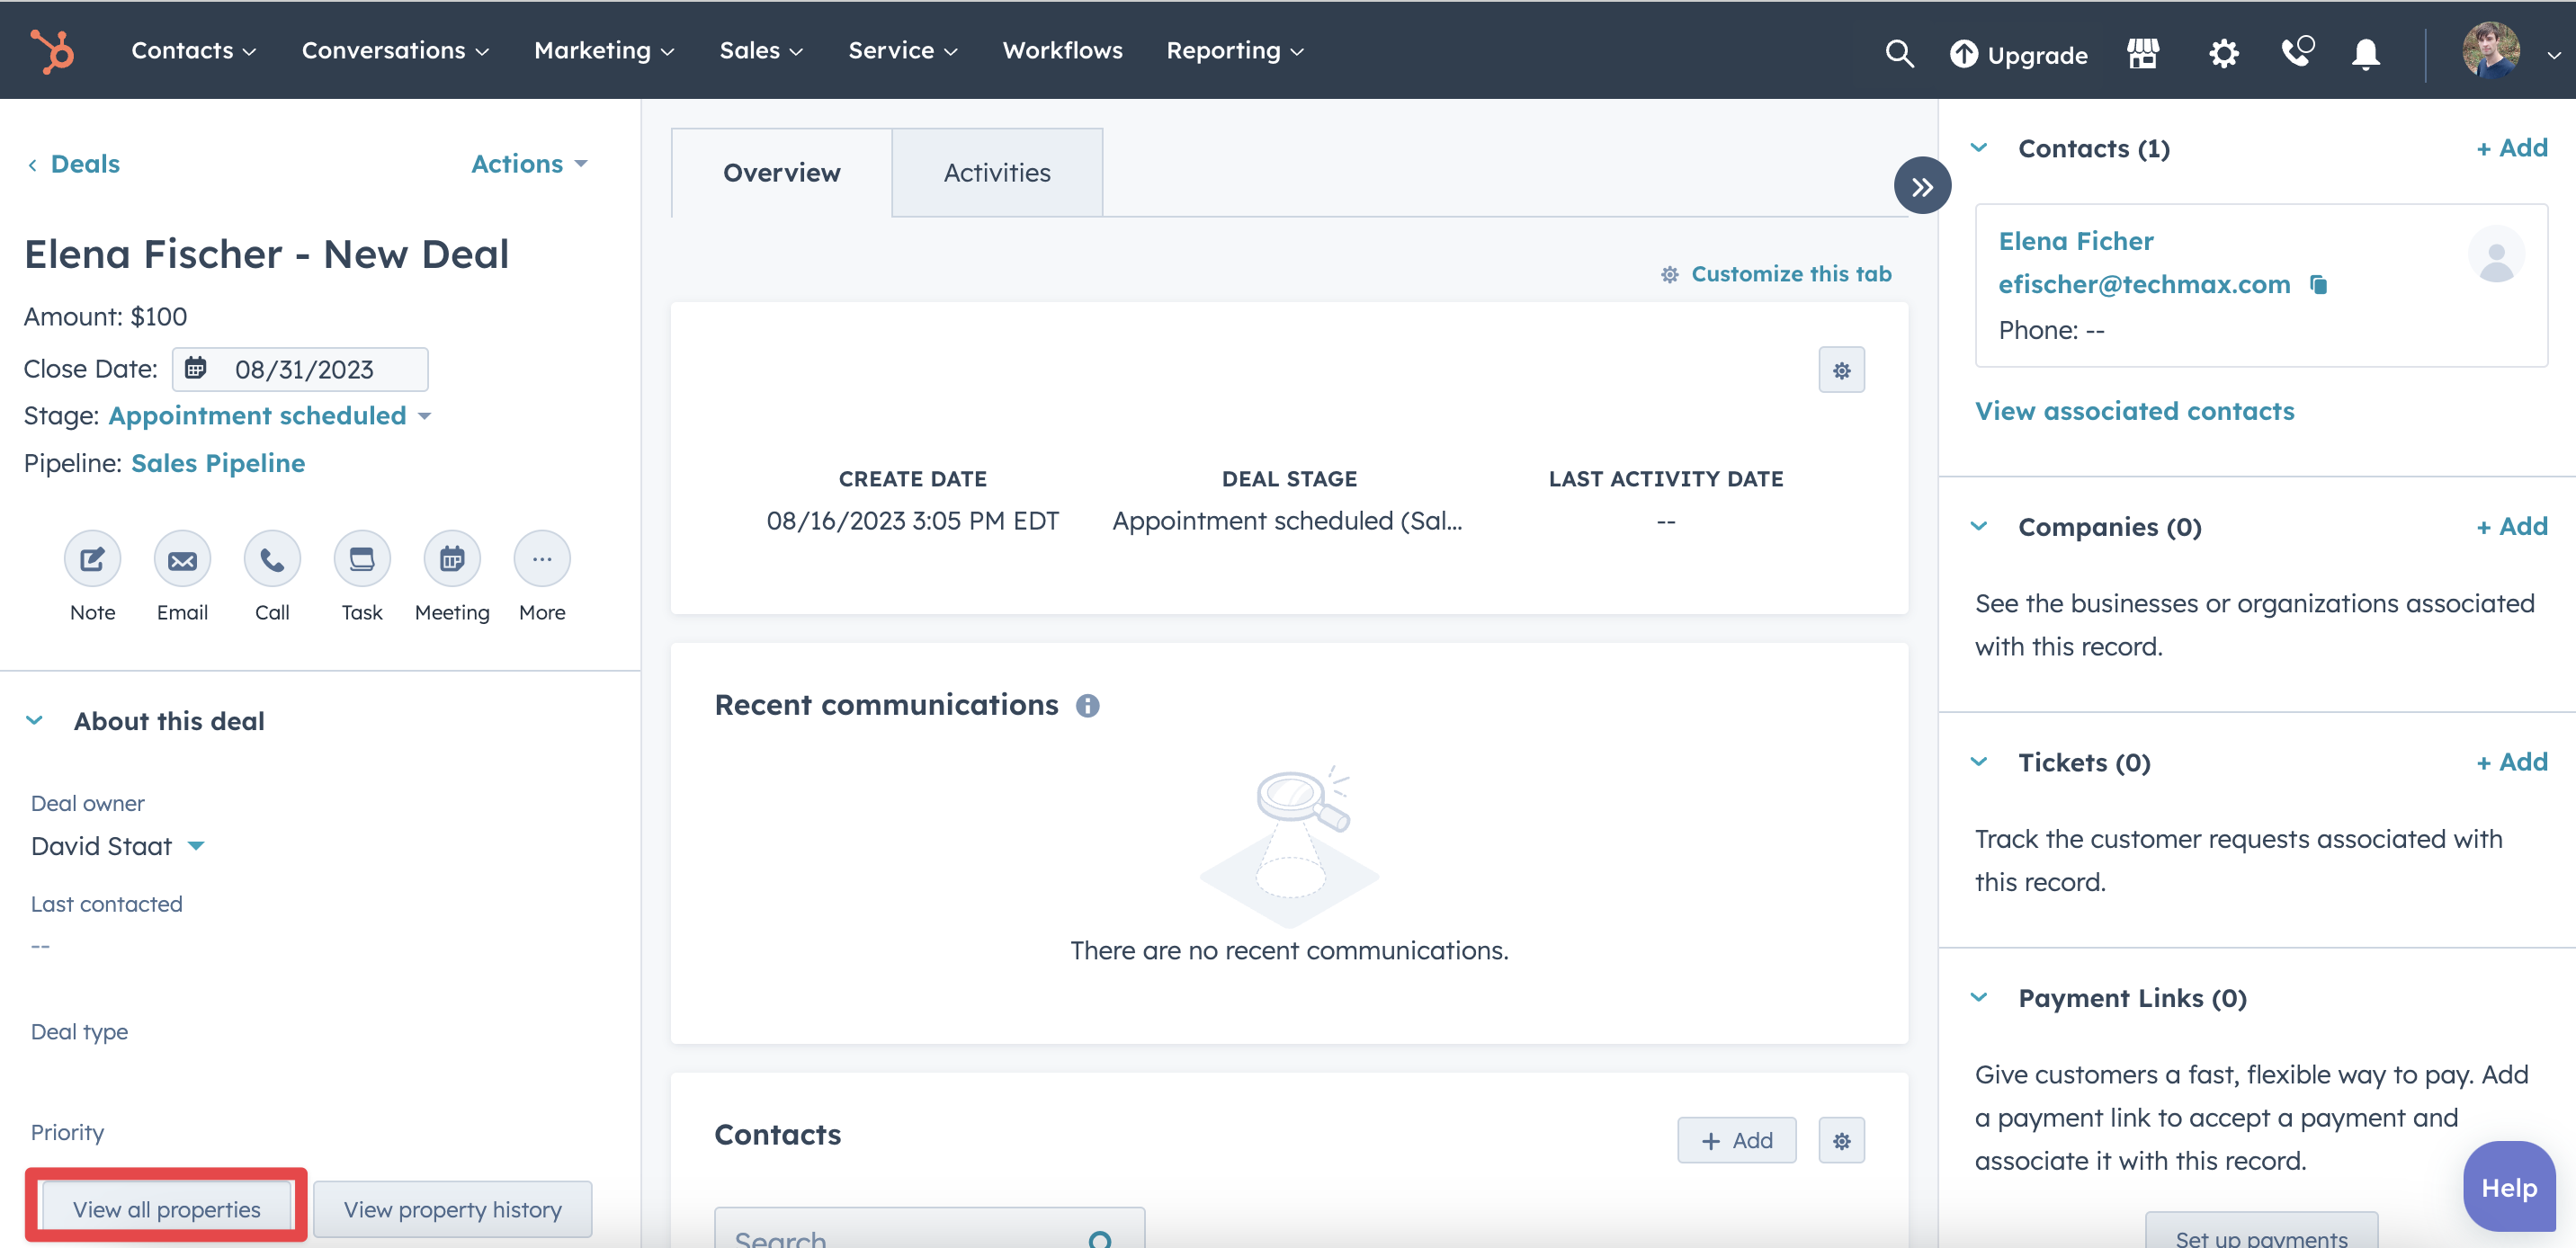
1. First things first. On the deal object record, click View all properties on the left sidebar.
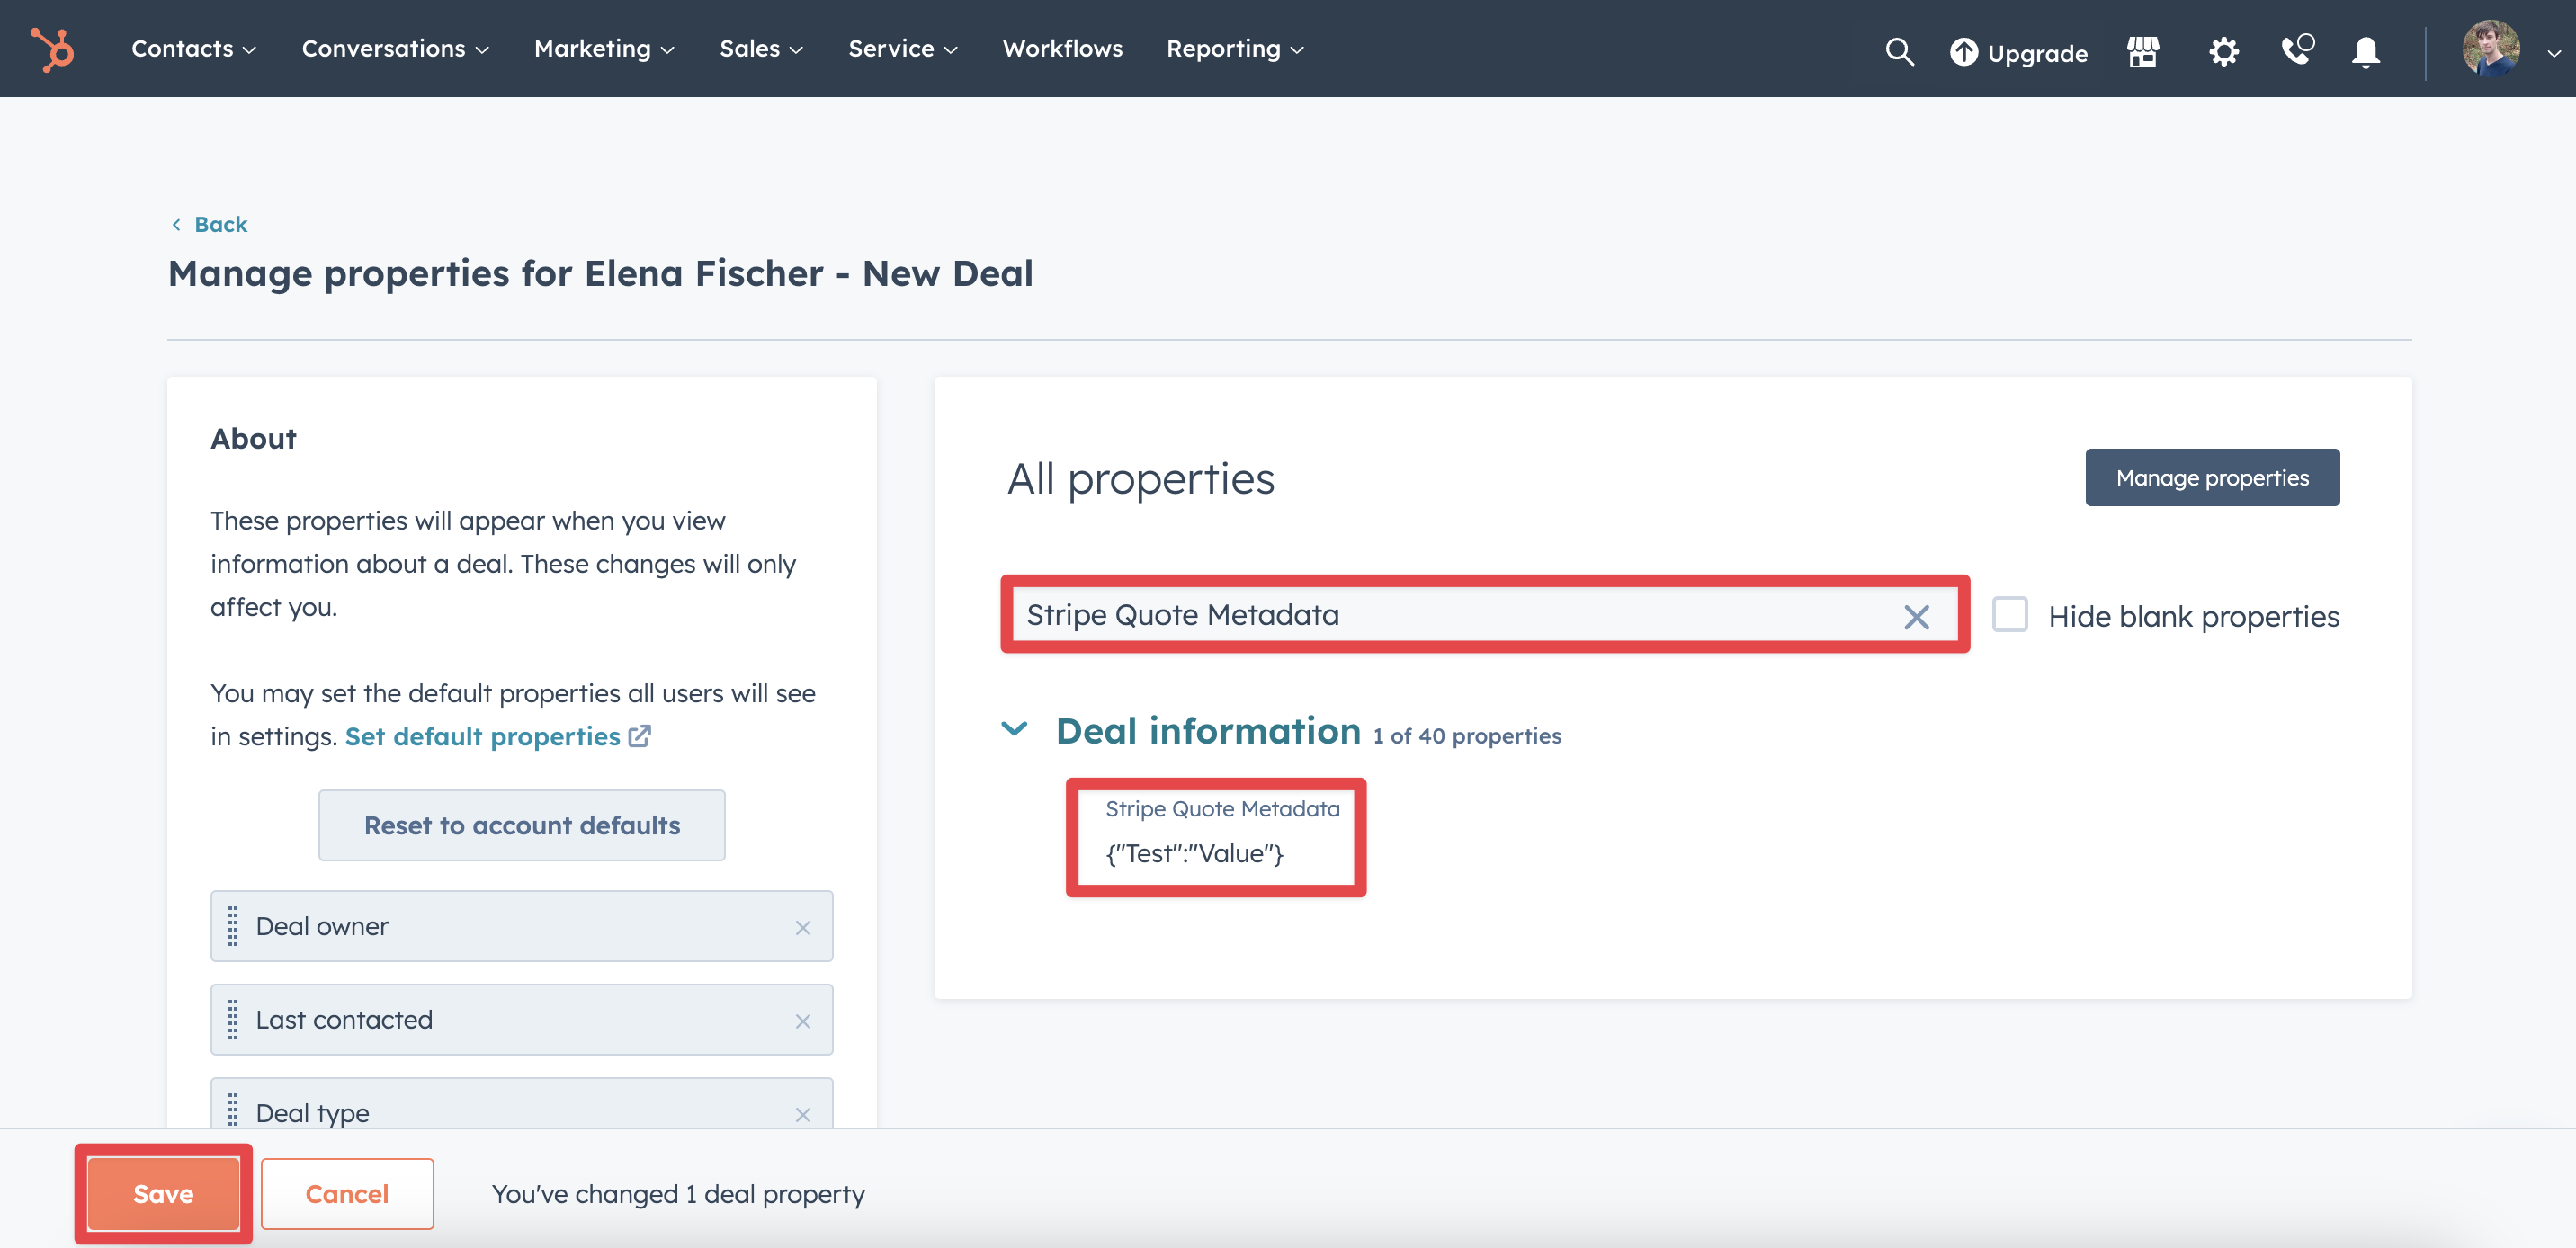
2. Search for or find the Stripe Quote Metadata property. This is where we’ll enter in the metadata we want added to the subscription. It’s important to note that you want to fill in this property before creating the quote.
3. Metadata needs to be entered in as a key value pair! Don’t worry if you don’t quite understand what that means. Just enter your information using the following format:
{“Value1”:”Value2”}
You can also set multiple pairs by separating them with commas:
{"Value1":"Value2","Value3":"Value4"}
For this example, I’m going to use the key value pair {“Test”:”Value”}.
4. Click Save and that’s all that needs to be done here! Now to actually show how this info gets sent to Stripe.
How to add metadata to a Stripe subscription using saas•hapily
Now to get that quote created and paid for! Before you get to work, double check a few things:
- Make sure a recurring object has been added to the deal.
- Make sure that object is mapped in your hapily portal. If you aren’t sure or don’t know how to do so, you can find instructions for it here.
- I stated this before, but make sure you enter in the Stripe Quote Metadata property on the deal before you create the quote.
With all that said, it’s time to pay up! I’ll show you the end result in case you don’t have a test portal set up.
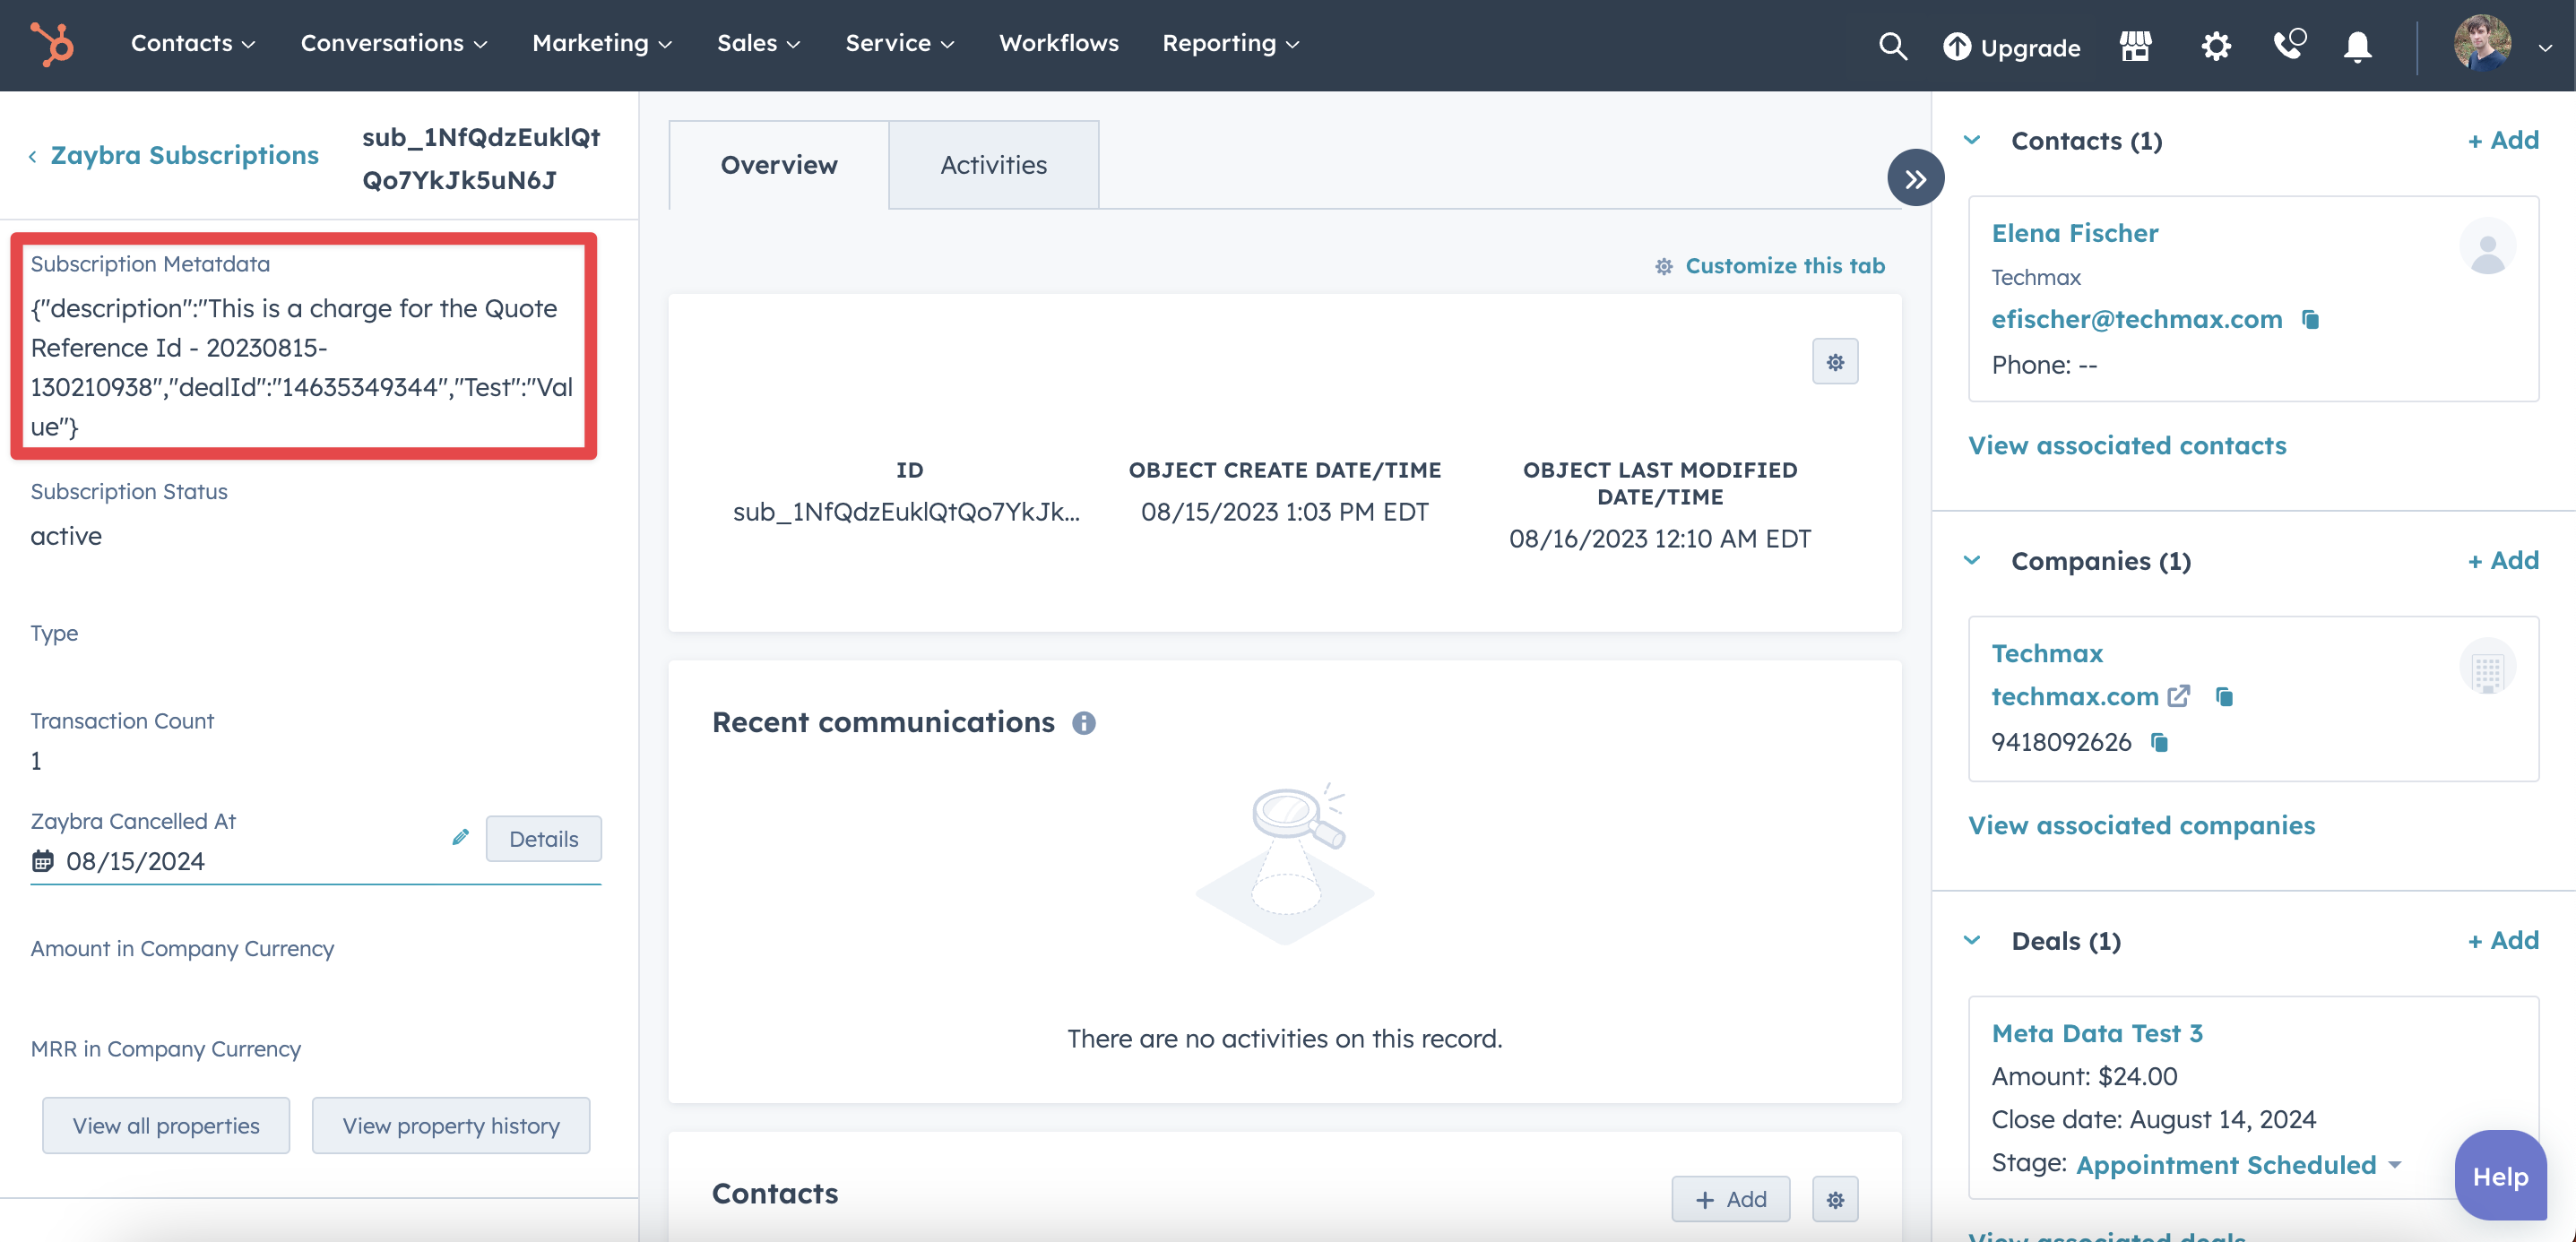
Once the invoice is paid, the metadata you added will be entered into two places. The Subscription Metadata property on the subscription object...
... and under the Metadata section on the subscription record in Stripe!
And that’s all there is to it! Now you can enter metadata before a subscription is created and forget all about it. Why? Because saas•hapily will remember it for you.
If you enjoyed this post, why not share it with your friends? And if you want to see what else the app can do, check out this blog post on How to Cancel a Stripe Subscription Automatically Using saas•hapily!


