So you’re using sass•hapily to sync your Stripe info to HubSpot huh? I like your style! But the app does more than just sync data. It also allows you to manage and create Stripe subscriptions all from within the CRM. Which may lead to the question:
What if I want to create a quote that syncs data to Stripe when paid? Can sass•hapily not help me there?
Not so fast! As a matter of fact, sass•hapily can help you there. With sass•hapily’s custom quote, you can quickly and easily create quotes that will create payment and subscription data in Stripe.
Initial set up does require a bit of explanation though. But don’t worry! I’ll walk you through it. Let’s dive in!
How to install the sass•hapily Custom Quote
The subject is in the title folks! HubSpot doesn’t currently allow you to install new quote templates all willy-nilly. So we’ll need to do some work on the backend. It’s not as scary as it sounds.
First things first though! You’ll need to download and install HubSpot CLI. This will allow you to connect your computer command window directly to HubSpot. You’ll need this in order to install the sass•hapily custom quote to HubSpot.
Once you’ve got that set up, follow these steps:
1. First things first (again). You’ll need to download the sass•hapily quote onto your computer. Start by logging into your hapily portal here.
2. Click sass•hapily > Quote Templates in the left sidebar, and download the most recent version of the quote. You can download older versions if you want. But why though?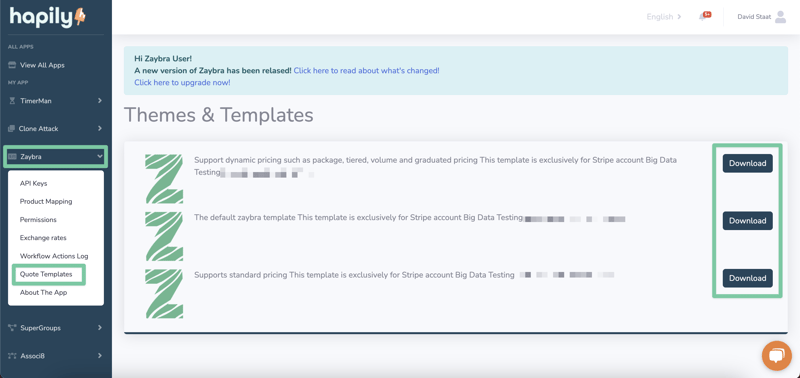
3. The quote will be downloaded as a zip file. So find it in your files and double-click on it to unload the treasure within. You may want to move it to an easy-to-find folder on your computer before doing this.
4. Now it’s time to put HubSpot CLI to good use! Go ahead and open it up.
5. It might look intimidating at first, but I have all the commands you need to enter right here! Type in the command hs auth. This will create an access key that will allow you to connect to HubSpot.
6. Once you’re connected, type in the command hs upload {name of the sass•hapily quote file in your computer} {what you want to name the file in HubSpot}. This will start uploading the sass•hapily quote to your HubSpot instance.
7. The upload process will take a little while. Once it’s done, hop onto your HubSpot account and click Settings.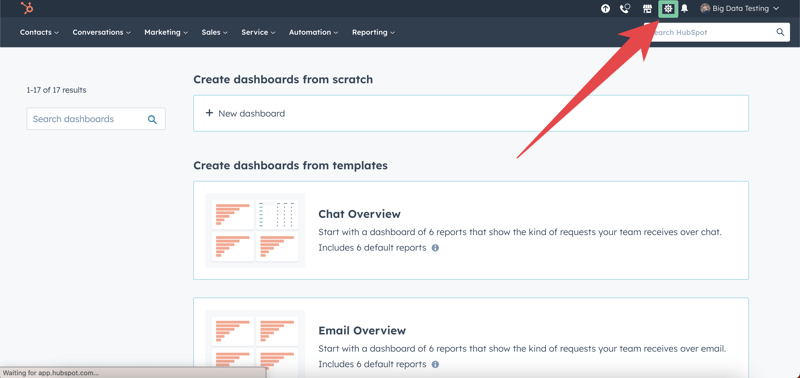
8. In the left sidebar, click Objects > Quotes.
9. Click the Quote templates tab and click Customize quote template.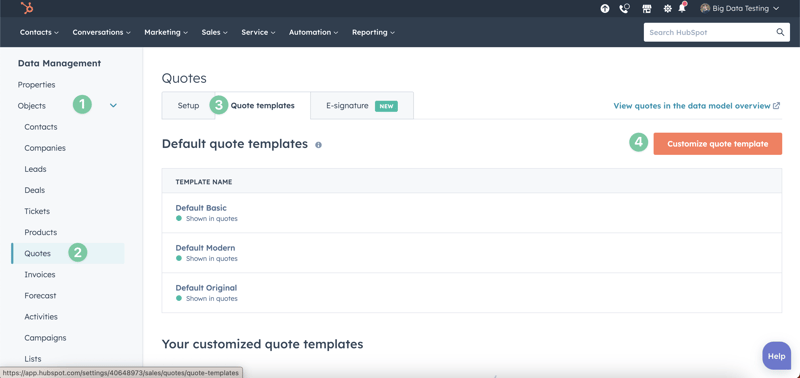
10. Select the Modern sass•hapily-cms-quotes-theme template.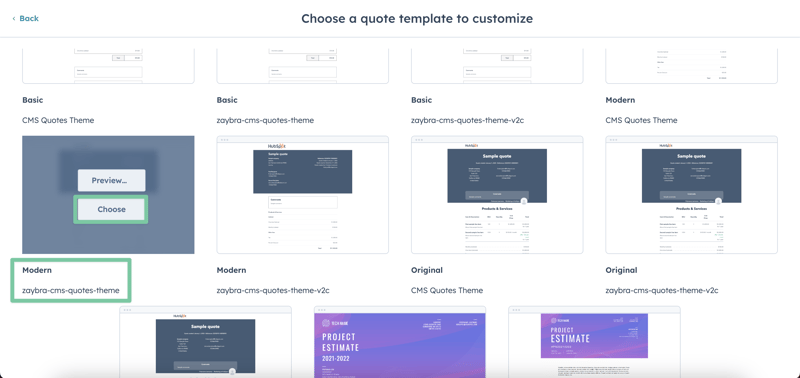
11. Give it a name (if you want) and then click Save.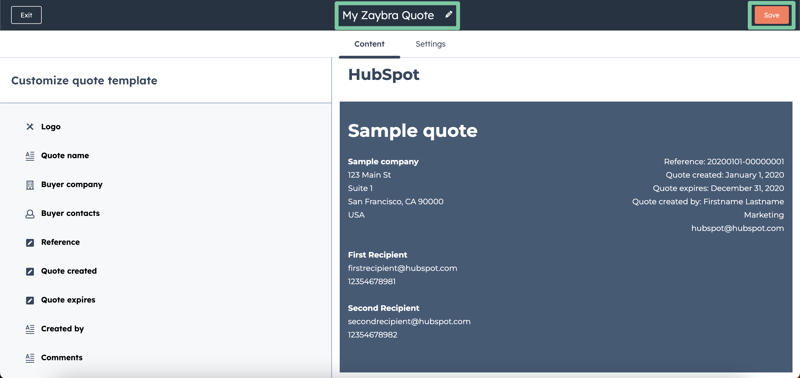
And you’re done! Now whenever you go to create a quote, the sass•hapily quote template will appear under the template dropdown list.
And that’s all there is to it! If you enjoyed this post, why not share it with your friends? And if you want to see what else the app can do, check out this blog post on how sass•hapily handles dynamic pricing!


